Setting Up Python with Anaconda for Class: Installation and Environment Preparation
November 25, 2024 18:10
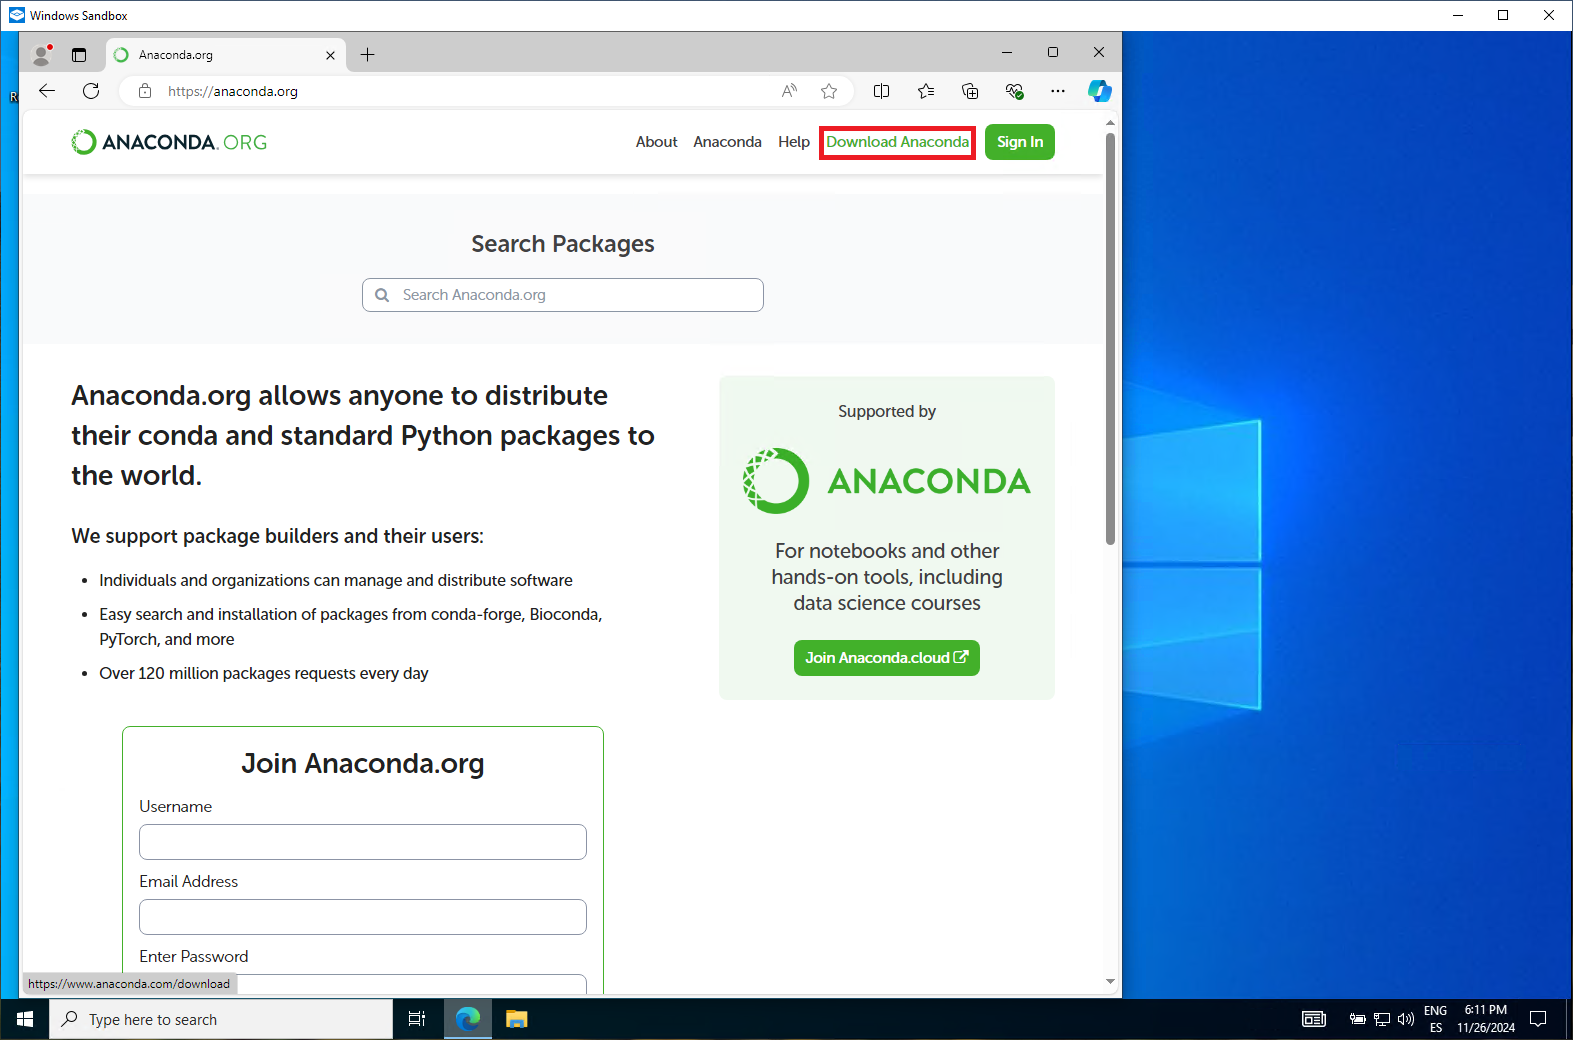
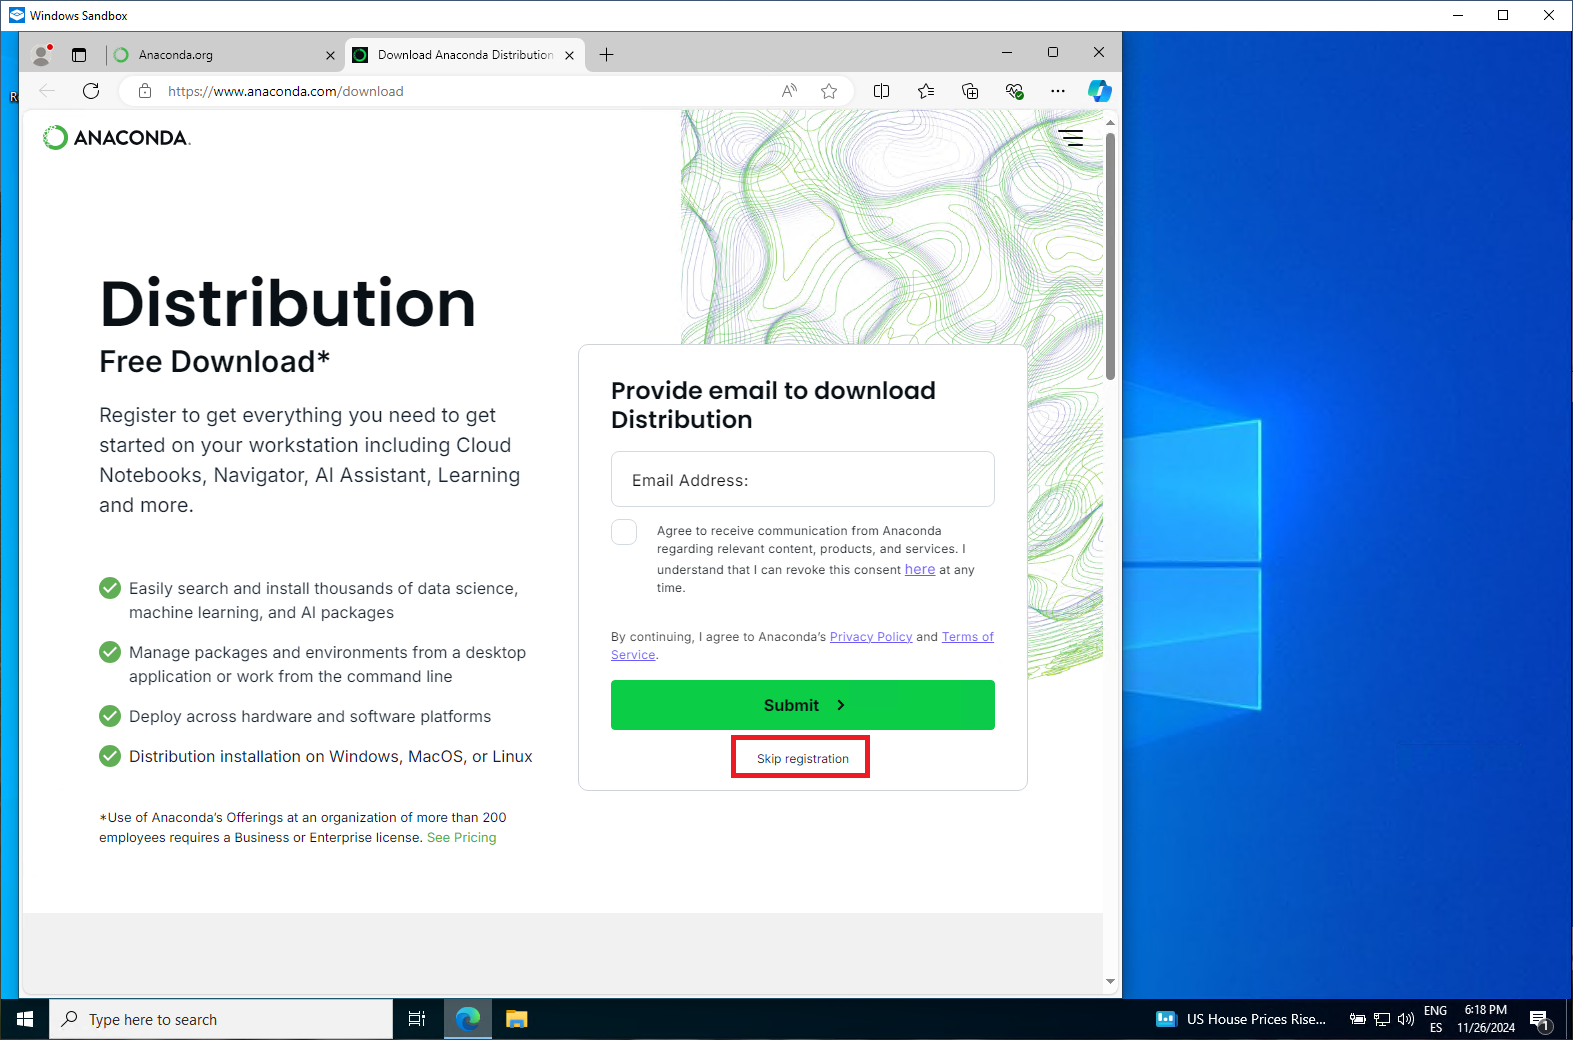
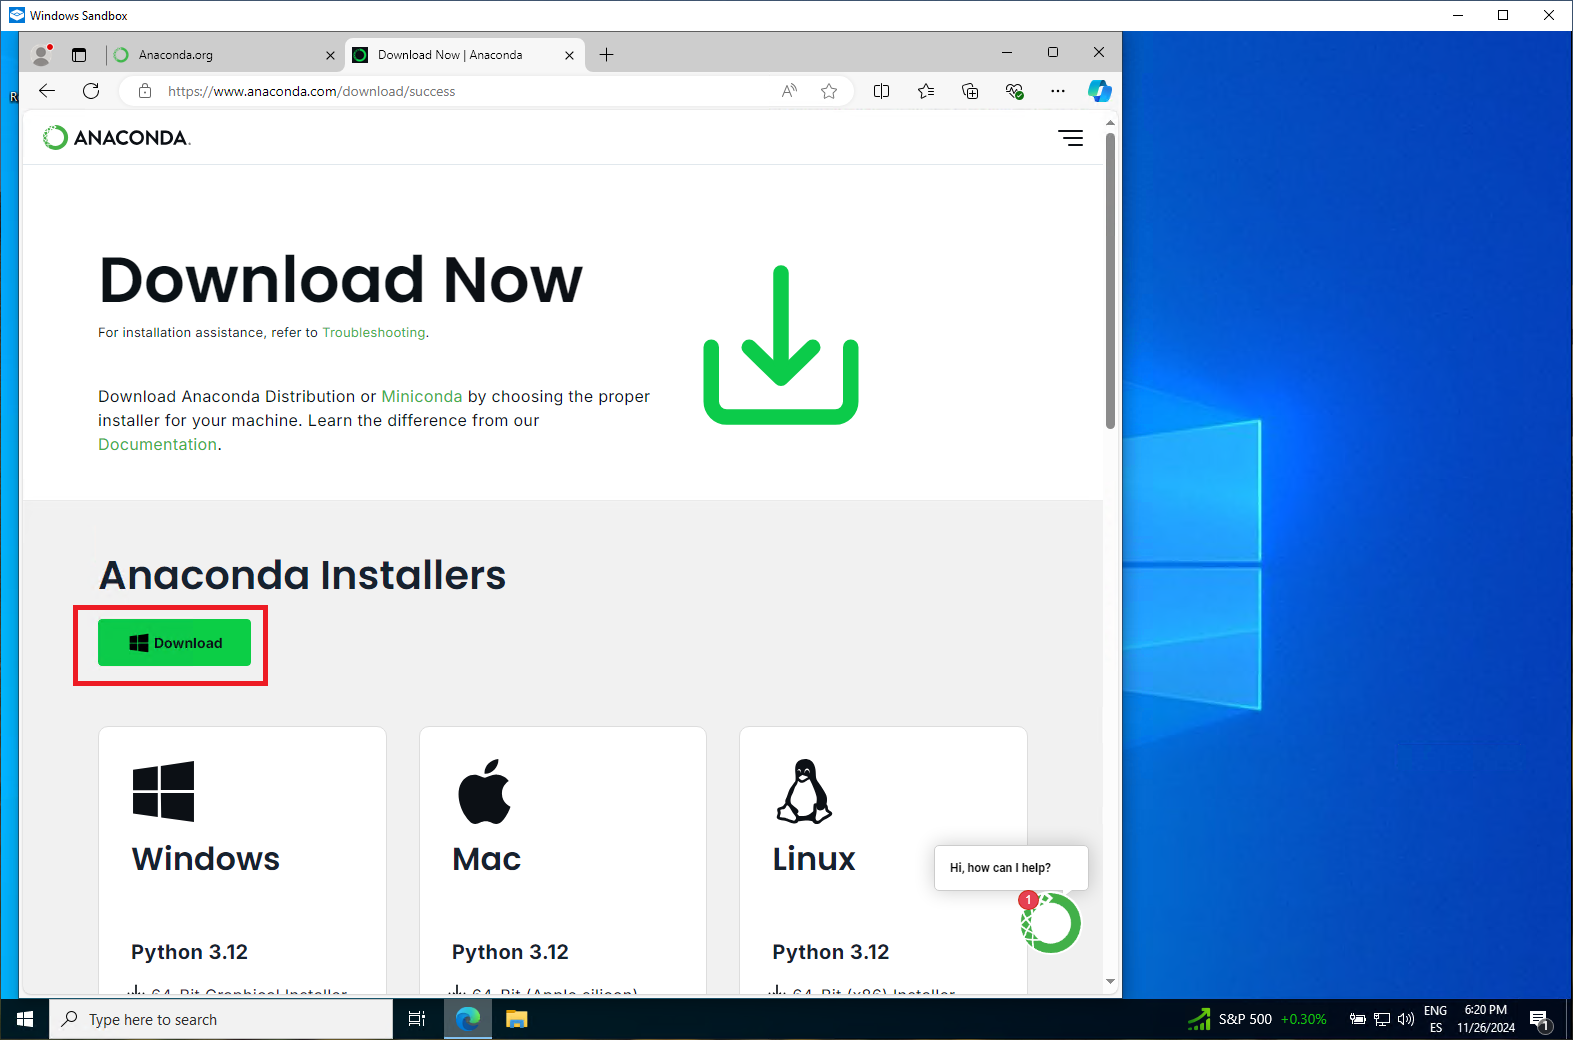
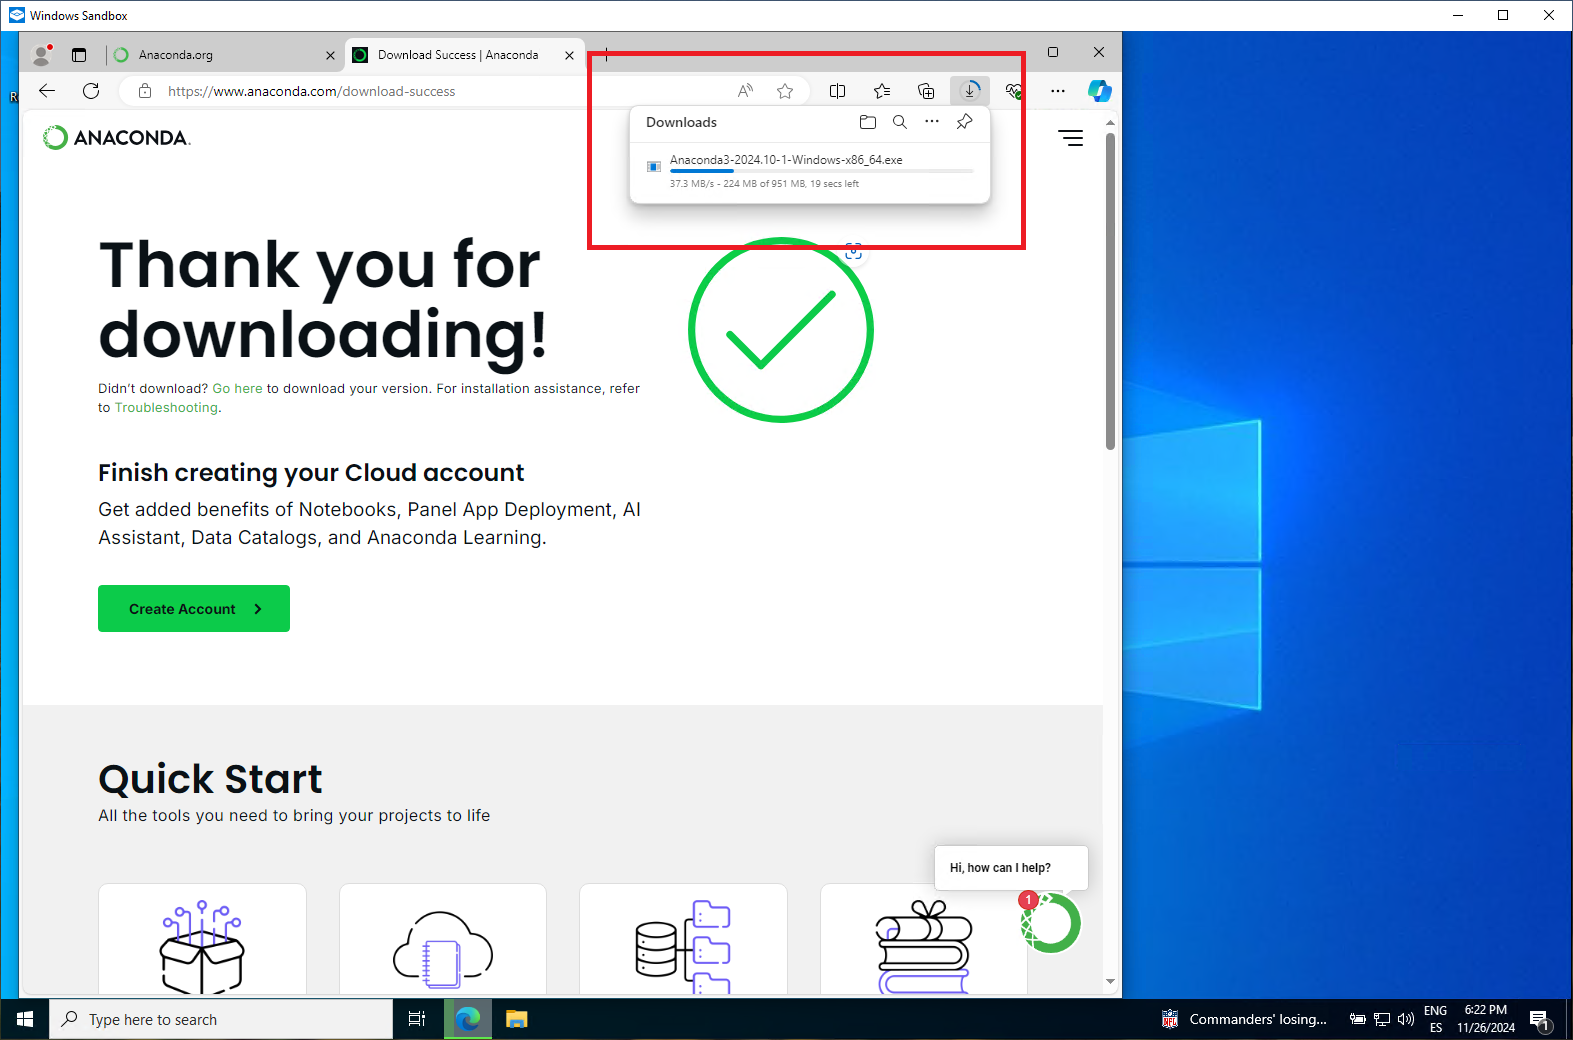
1 - First, go to the Anaconda website () and download the Anaconda installer. Choose an installer compatible with your computer’s operating system. This lecture provides an example in the Windows Sandbox.
2- Warning: Before installing Anaconda, it is recommended to uninstall any previous versions of Python. This helps avoid conflicts between different Python versions and ensures that Anaconda's Python installation doesn't overwrite or cause configuration issues. By doing so, you'll have a clean environment to work in, minimizing potential problems and ensuring smoother operation with Anaconda.
3 - After downloading and executing the anaconda installation file, follow the procedure below to install the program.

4 - At the end of the installation, of the previous step in the final window, make sure to check the box that says "Launch Anaconda Navigator." This will allow Anaconda Navigator to open automatically after the installation is complete, giving you easy access to manage environments, packages, and launch Jupyter notebooks or other tools directly from a user-friendly interface. Leaving this option checked will save you time and ensure you're ready to start working right away.
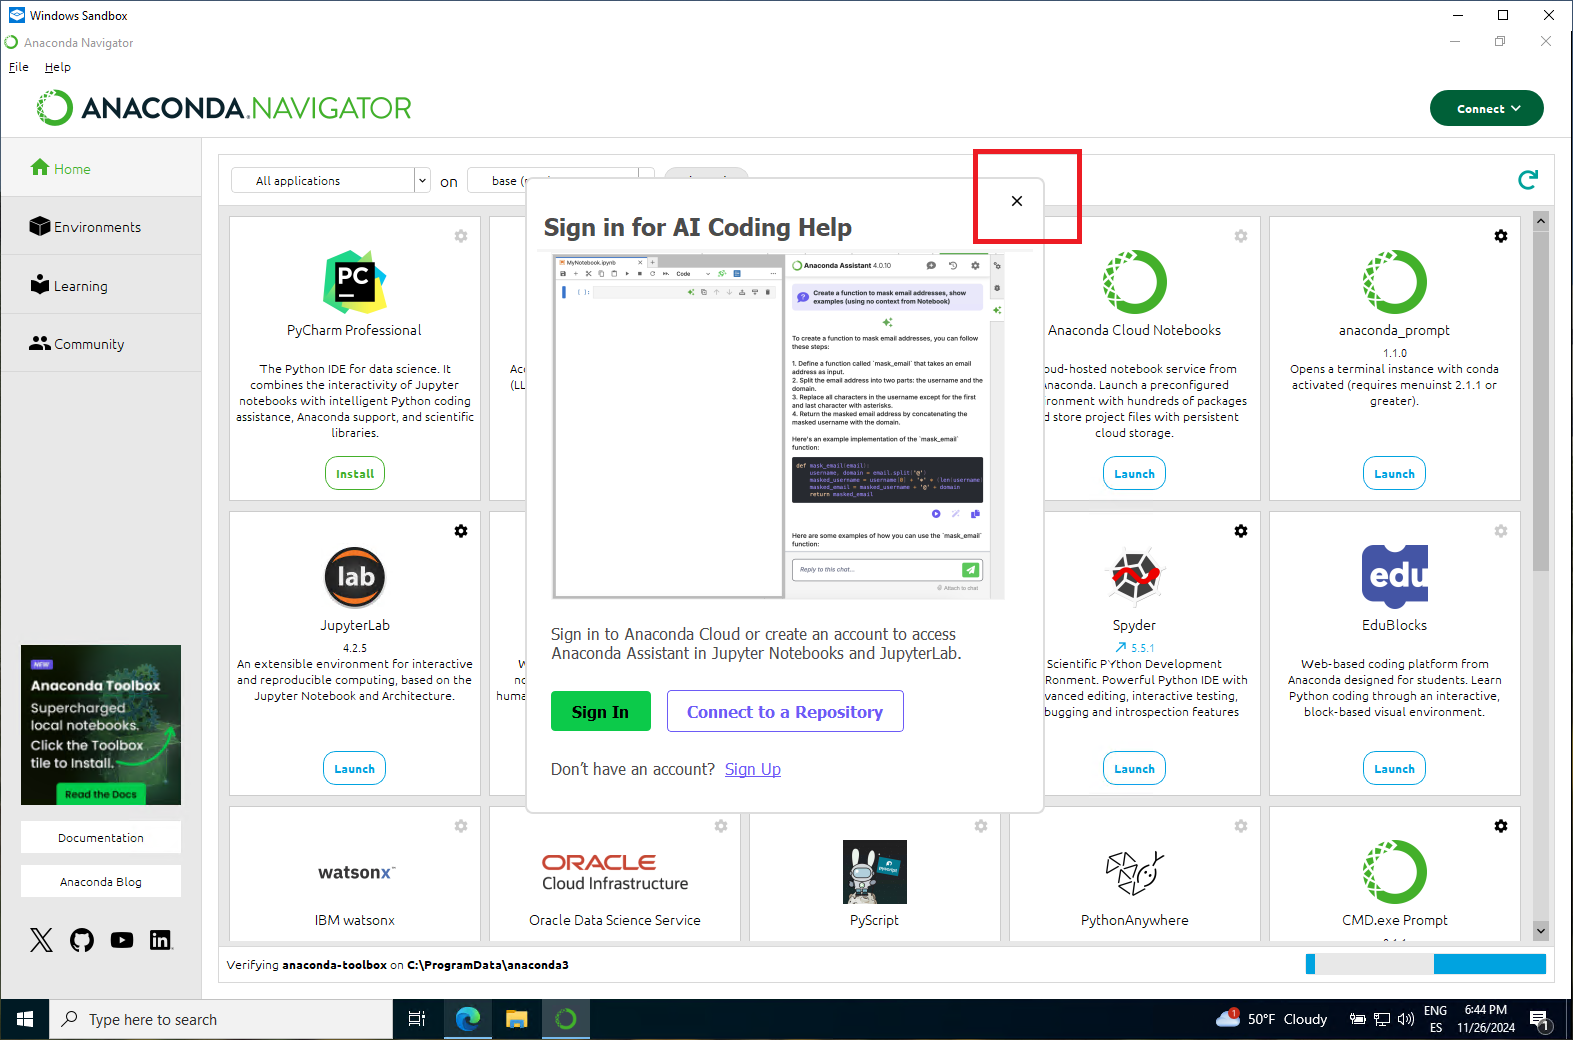
5 - Close the windows "Sign for AI coding Help"
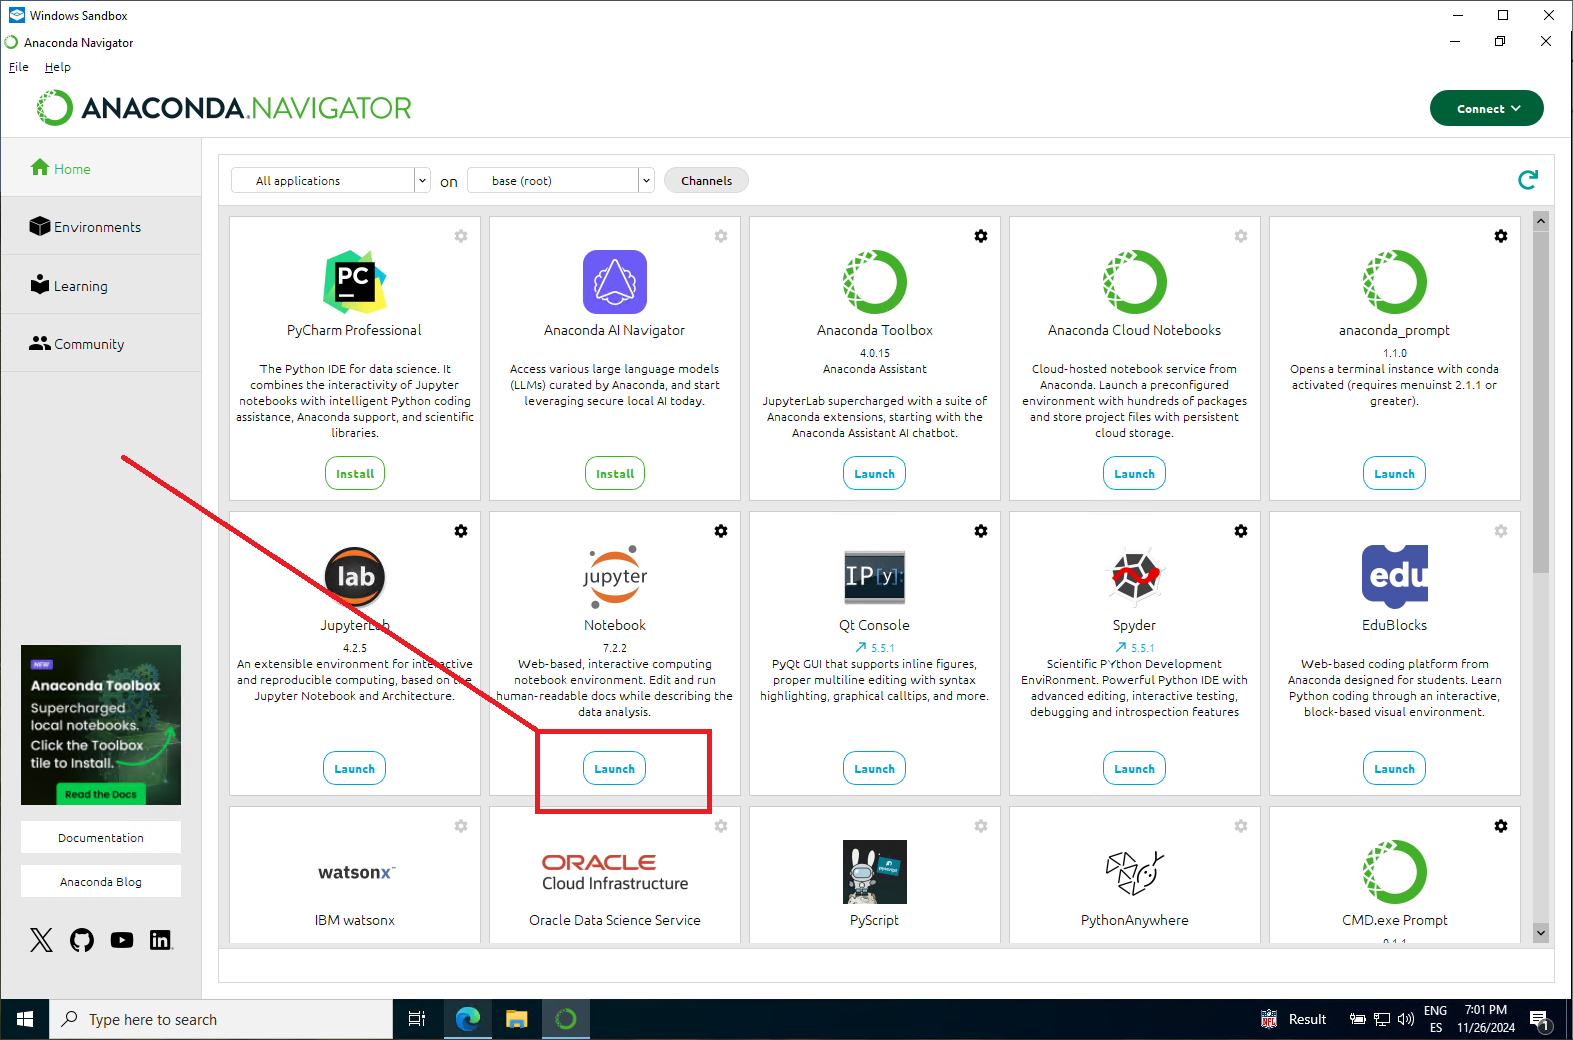
6 - Once Anaconda Navigator is running, open it and look for the "Jupyter Notebook" option. Click on the "Launch" button next to Jupyter Notebook. This will open a new tab in your default web browser, where you can create and work with Python notebooks interactively. Jupyter Notebook is a powerful tool for writing, running, and sharing Python code, and it’s ready to use once it launches from Anaconda Navigator.
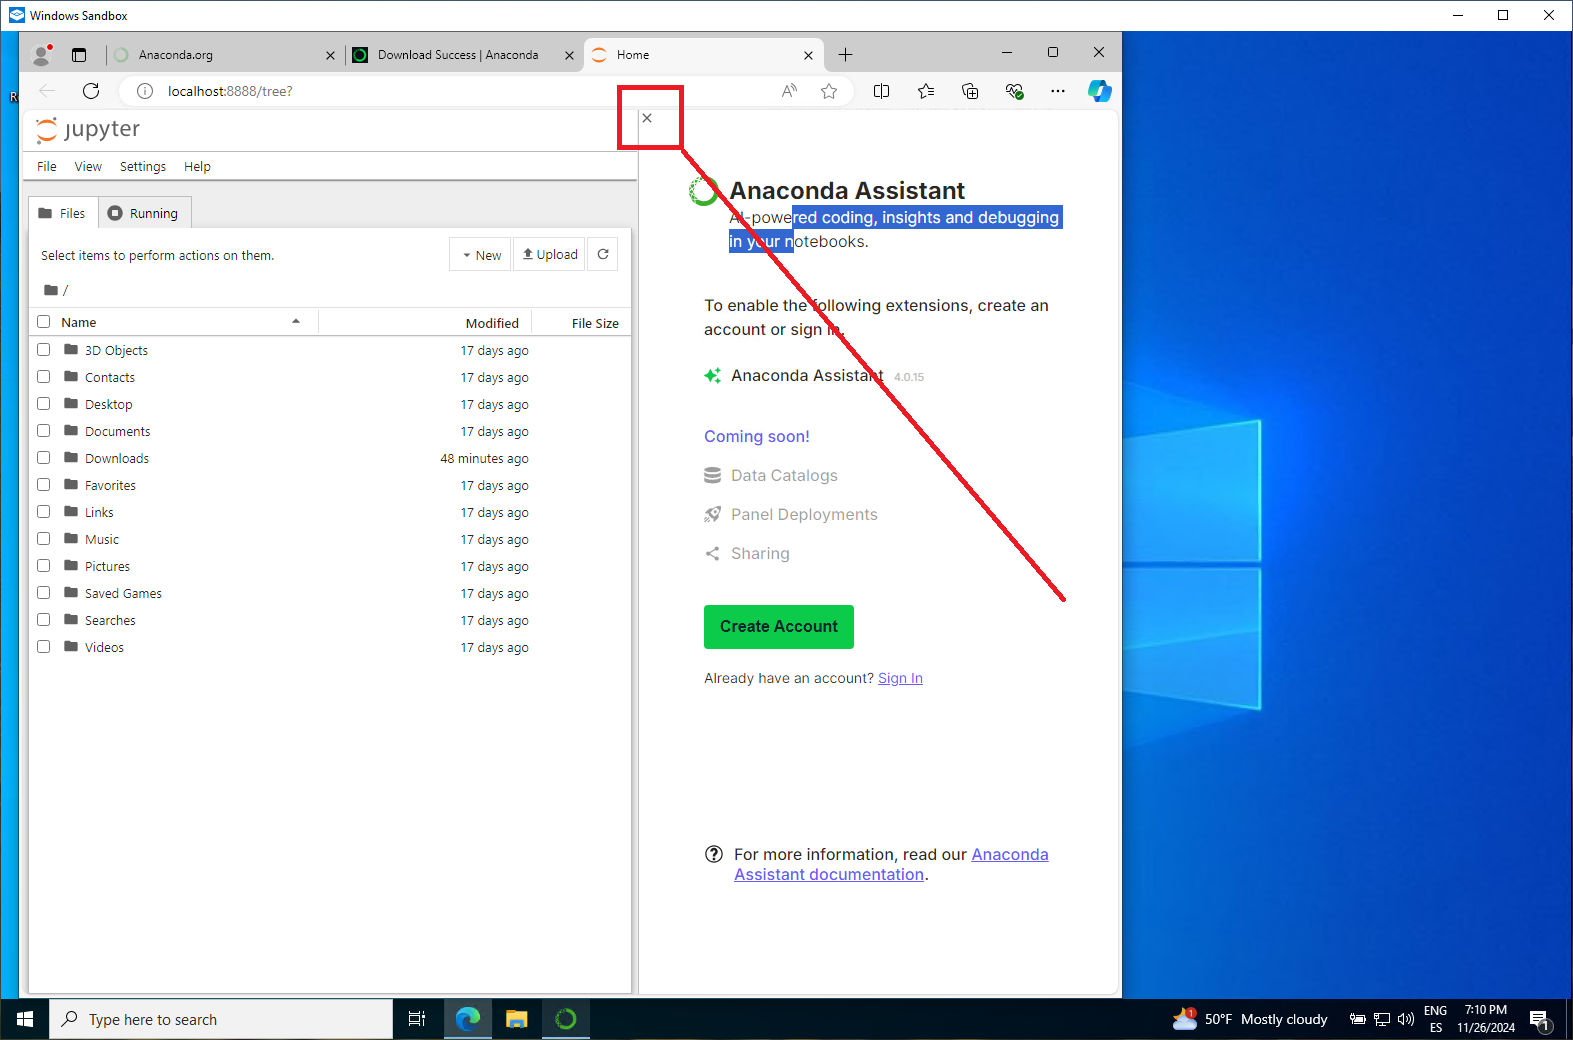
7 - The previous step will launch Jupyter Notebook in your web browser. When the Jupyter Notebook page opens, you may see a window called "Anaconda Assistant". This is the window you need to close first before to continue testing if your set up is fine and free of issues!
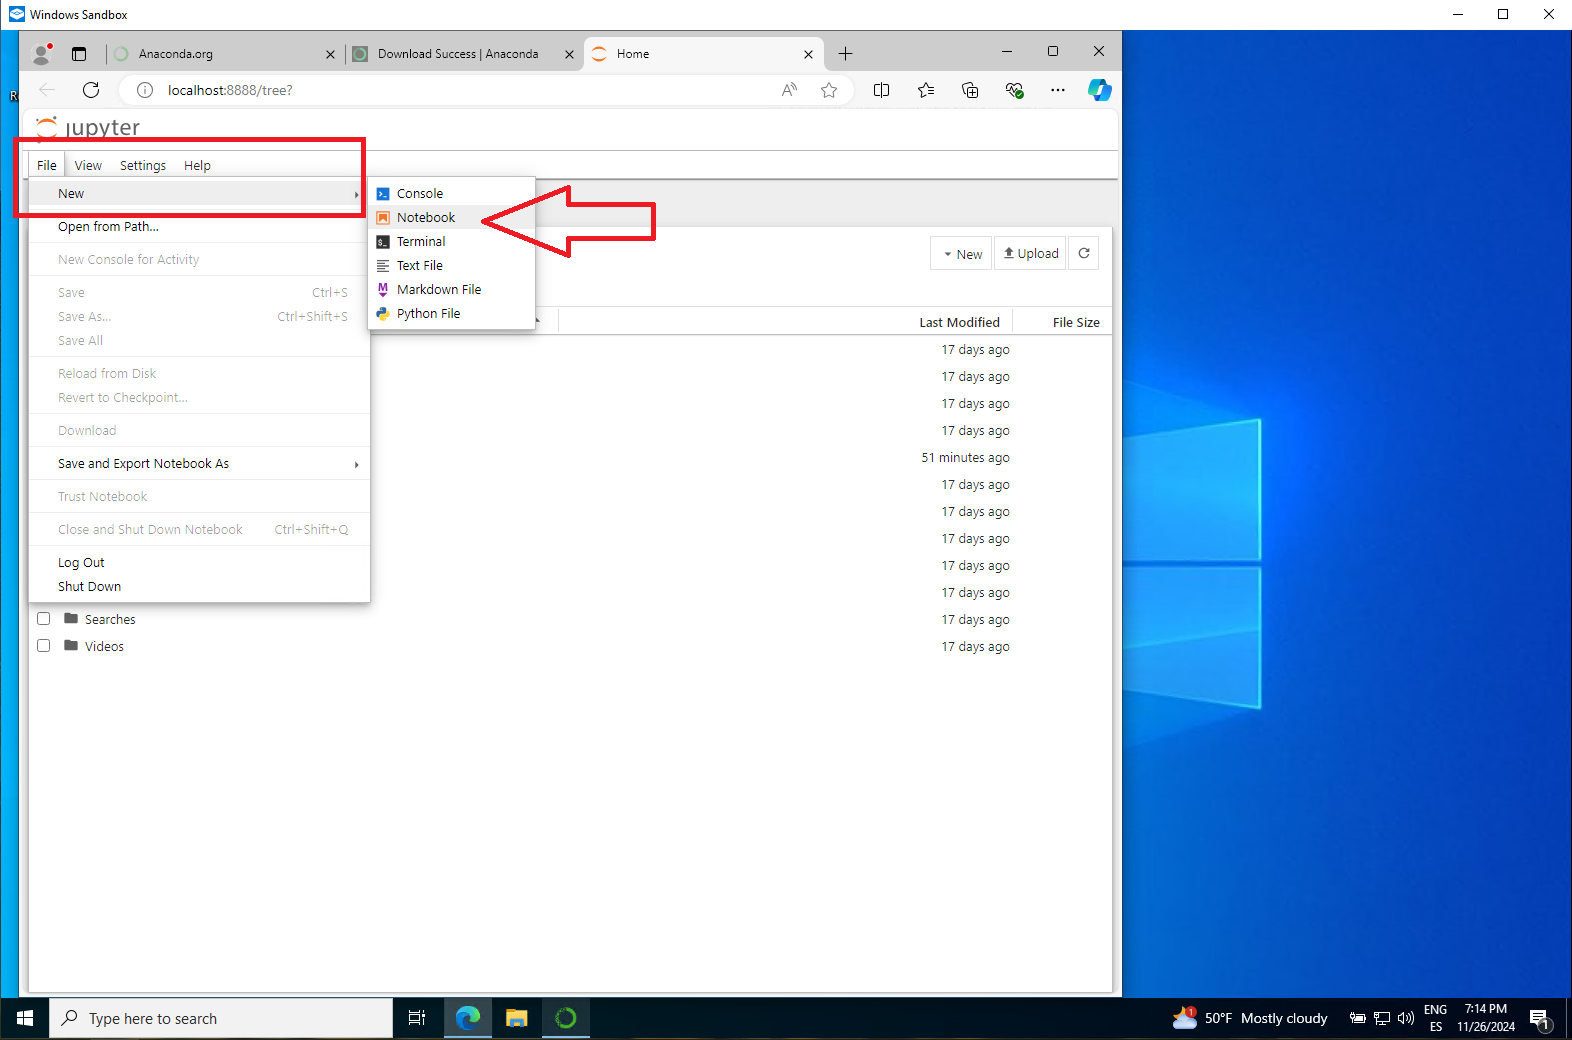
8 - After closing the Anaconda Assistant window, go to the File menu at the top left of the Jupyter Notebook page and select New Notebook to create a new notebook.
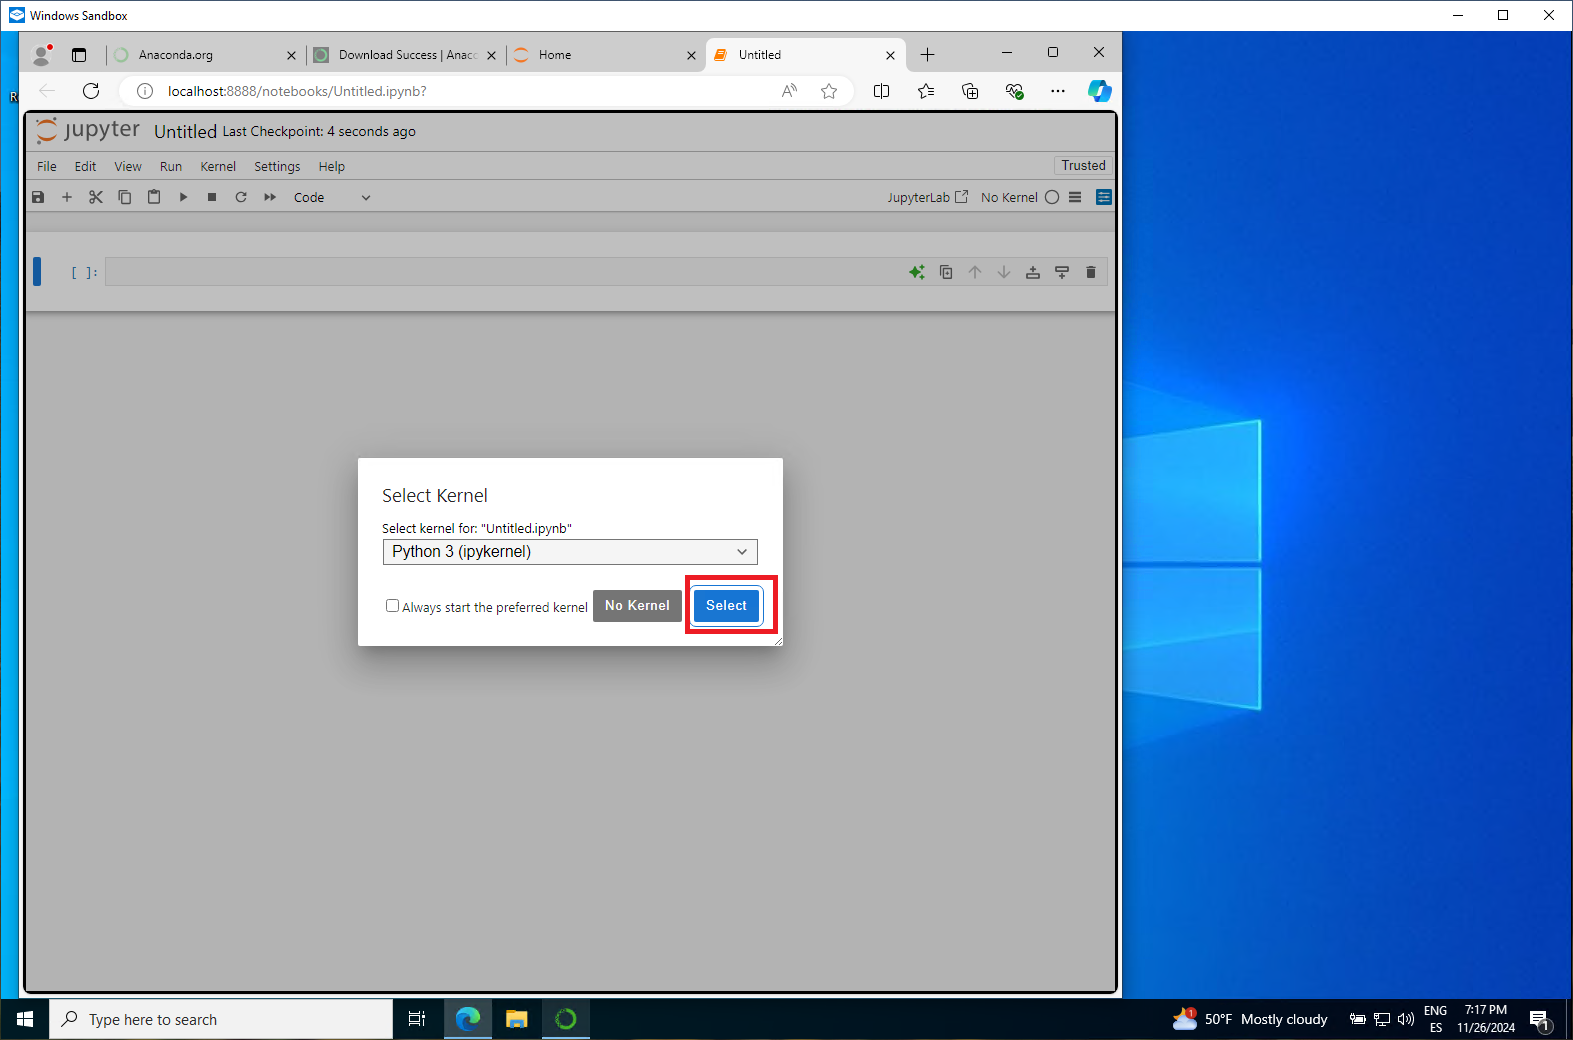
9 - Select the default Python 3 (ipykernel)
10 - Test the Environment
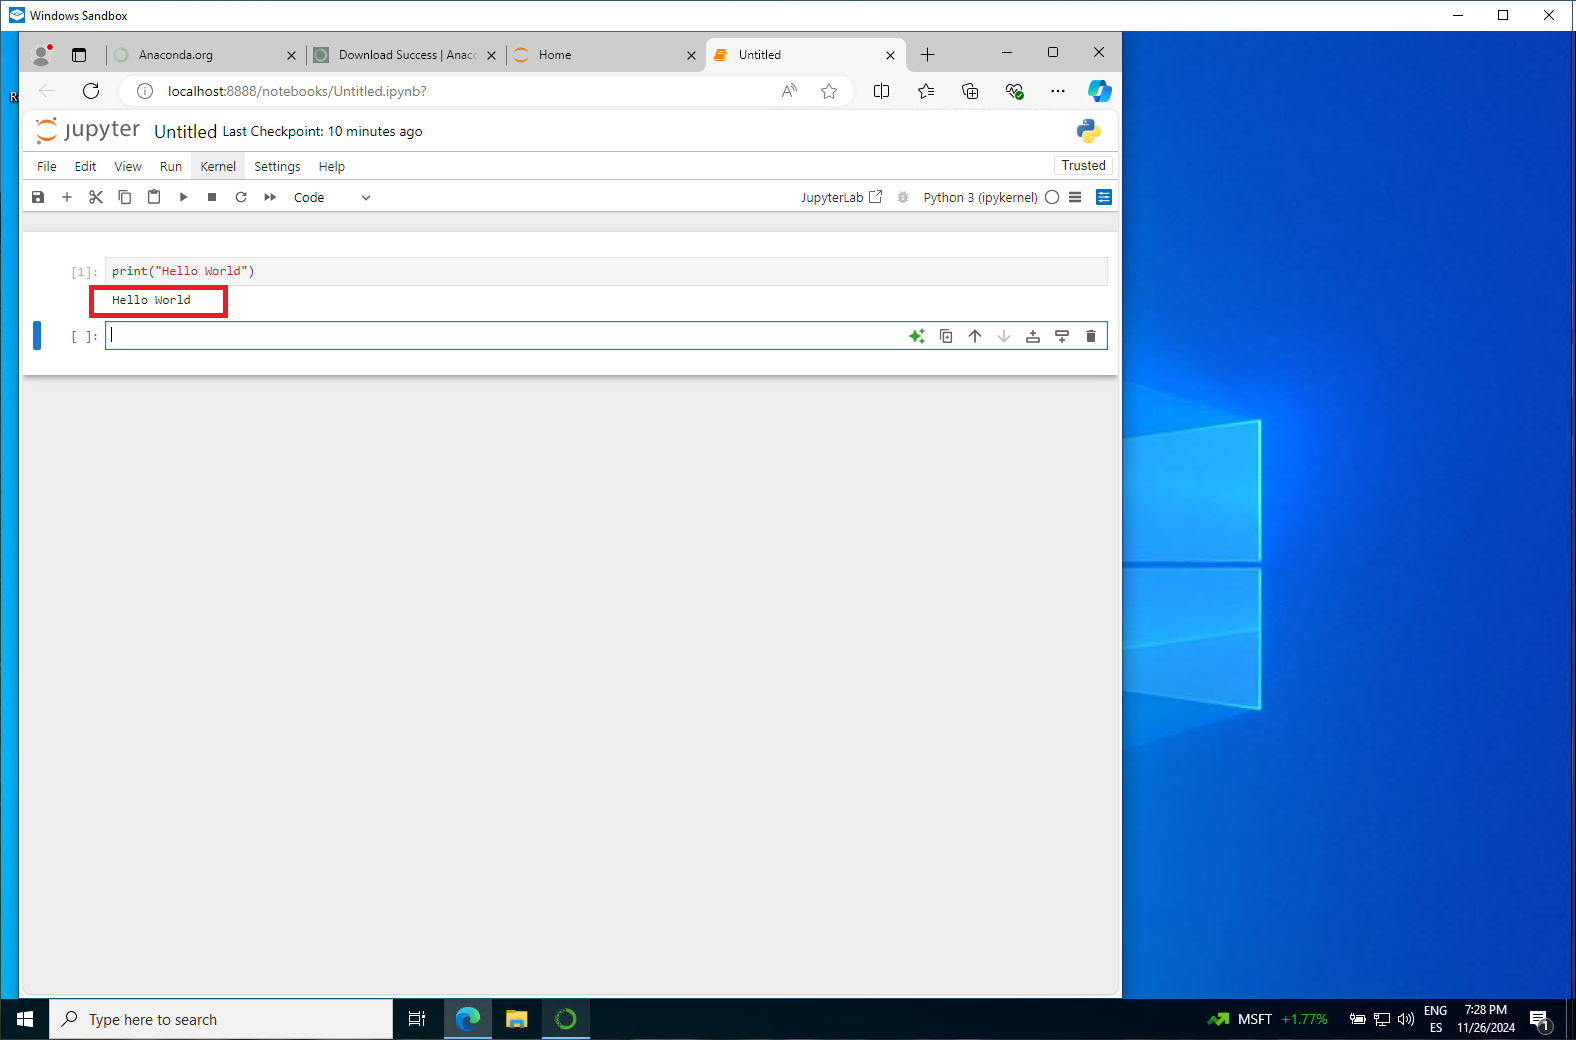
To ensure everything is set up correctly, let's test the environment, in the first cell of the new notebook, type the following code:
print("hello world")
Press Shift + Enter to execute the cell or press the play button like you can see on this picture:

If everything is working correctly, you should see the output "Hello World" displayed below the cell.
Once this is all set up and working, you’re ready to begin your classes and work with Jupyter Notebook without issues.
If you encounter any problems and are unable to get this to work, please contact your teacher via WhatsApp to report the issue. However, make sure you have followed each step carefully and that the code still doesn’t execute before reaching out for help.
11 - End. Once you have tested the environment and everything is working correctly, you can go ahead and close the Jupyter Notebook and Anaconda Navigator. Your teacher will provide further instructions on how to continue, and you'll be able to enjoy the learning process. We look forward to seeing you in class at the start of the course.
Happy coding!

Comments are closed.